-

 Trending
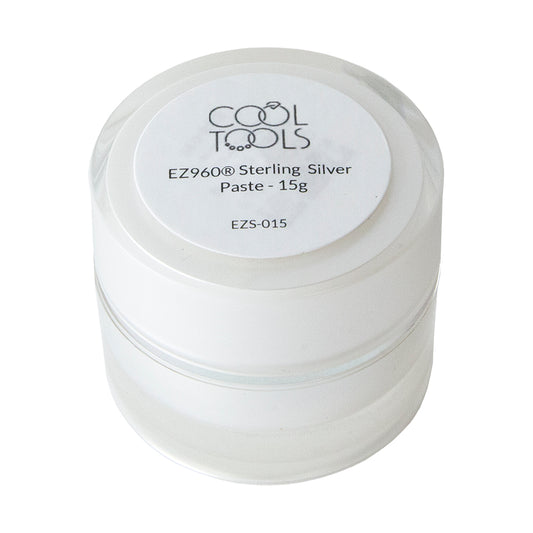
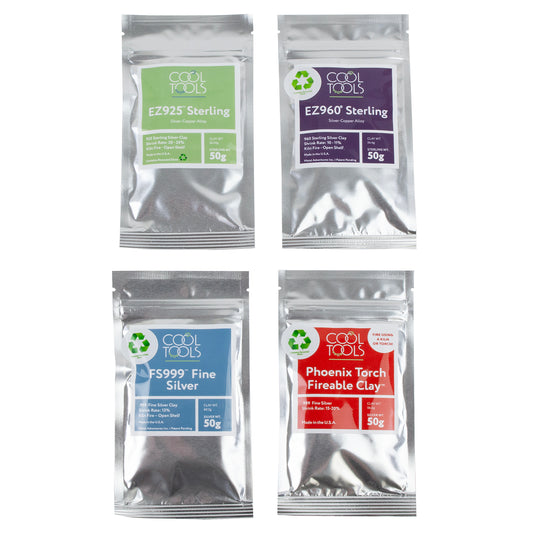
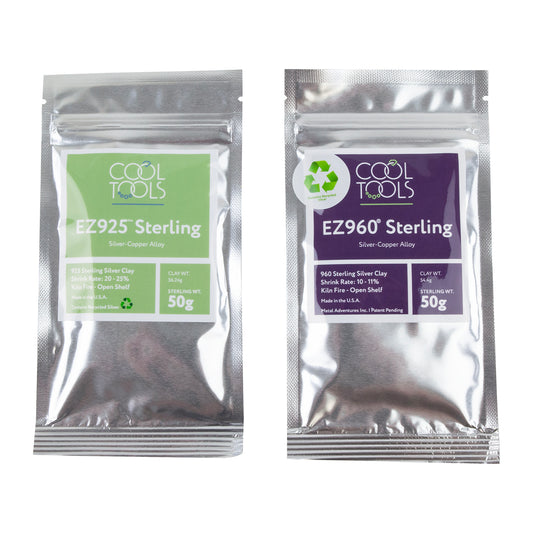
EZ960® Sterling Silver Clay
Regular price From $159.50 USD to $499.95 USDRegular priceUnit price per$0.00 USDSale price From $159.50 USD -
EZ960® Sterling Silver Paste - 15 gram
Regular price $109.95 USDRegular priceUnit price per -
EZ960® Sterling Silver Syringe - 10 gram
Regular price $89.00 USDRegular priceUnit price per -
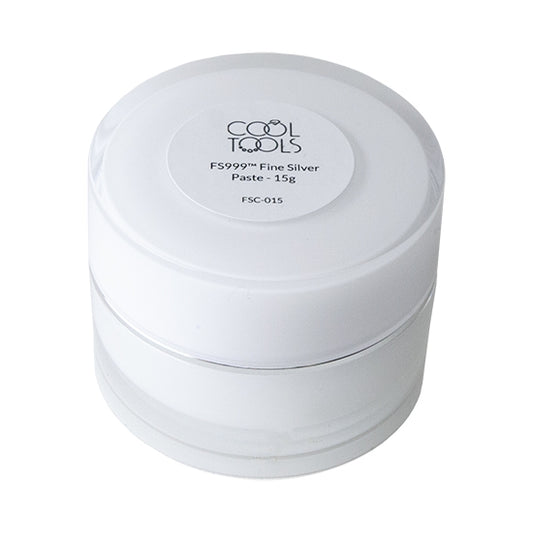
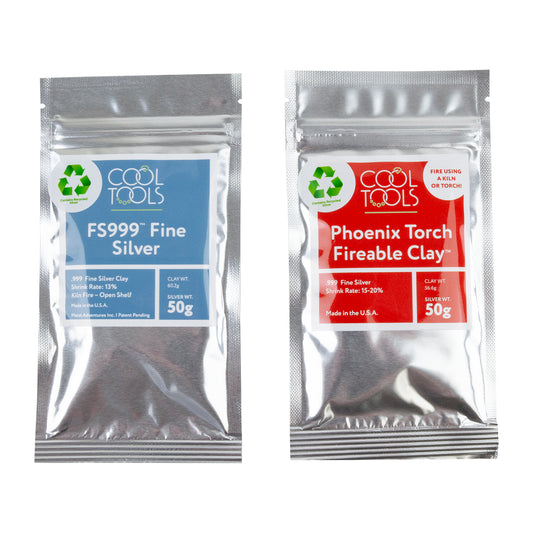
FS999™ Fine Silver Clay
Regular price From $152.50 USD to $475.00 USDRegular priceUnit price per -

 Trending
FS999™ Fine Silver Paste - 15 Gram
Regular price $99.95 USDRegular priceUnit price per -
FS999™ Fine Silver Syringe - 10 Gram
Regular price $83.00 USDRegular priceUnit price per -
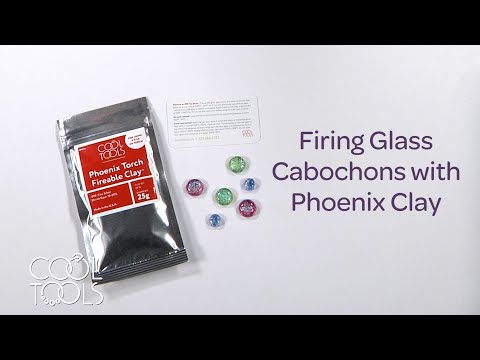
Phoenix Torch Fireable Clay™ - Fine Silver
Regular price From $94.95 USD to $475.00 USDRegular priceUnit price per -
Phoenix Torch Fireable Clay™ Paste - 15 gram - Fine Silver
Regular price $99.95 USDRegular priceUnit price per -
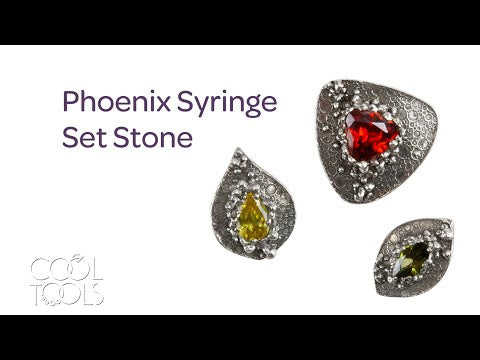
Phoenix Torch Fireable Clay™ Syringe - 10 gram - Fine Silver
Regular price $83.00 USDRegular priceUnit price per -
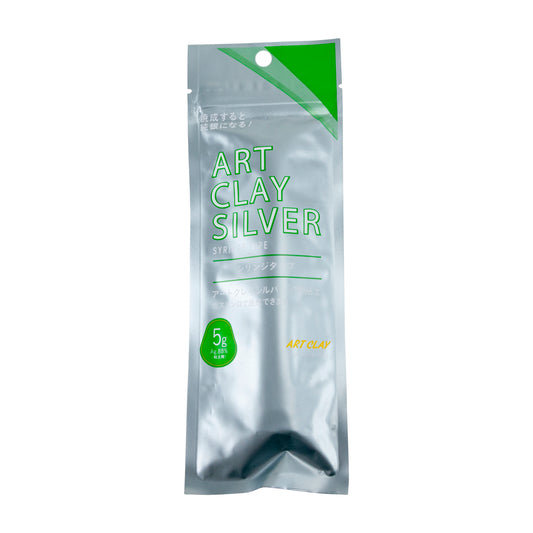
Art Clay™ Silver 950 Clay
Regular price From $149.95 USD to $289.95 USDRegular priceUnit price per -
Art Clay™ Silver Clay - Fine Silver Clay
Regular price From $39.95 USD to $305.95 USDRegular priceUnit price per -
Art Clay™ Silver Clay Overlay Paste - 15 gram
Regular price $119.95 USDRegular priceUnit price per -
Art Clay™ Silver Clay Syringe
Regular price From $40.95 USD to $79.95 USDRegular priceUnit price per -
Art Clay™ Silver Paper 10 gram
Regular price $87.95 USDRegular priceUnit price per -
Art Clay™ Silver Paper Plus+ 35 gram - 85 x 85 x 0.6mm
Regular price $229.95 USDRegular priceUnit price per -
Art Clay™ Silver Paste - 20 gram
Regular price $128.95 USDRegular priceUnit price per -
Art Clay™ Silver Paste 10 gram
Regular price $67.95 USDRegular priceUnit price per -
Metal Magic - Silver Clay
Regular price From $205.65 USD to $402.50 USDRegular priceUnit price per -
Metal Magic - Sterling 960 - Metal Clay
Regular price From $203.65 USD to $320.00 USDRegular priceUnit price per -
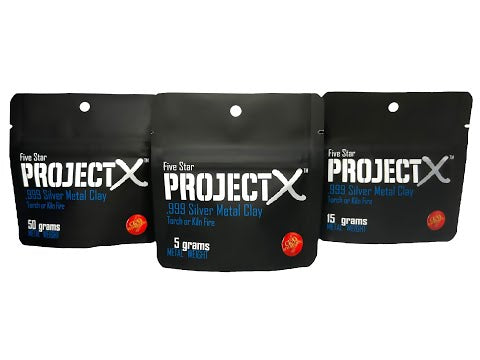
Five Star Project X™ - .925 Silver Clay
Regular price From $110.00 USD to $207.00 USDRegular priceUnit price per -
Five Star Project X™ - .960 Flex Silver Clay
Regular price $110.00 USDRegular priceUnit price per -
Five Star Project X™ - .960 Silver Clay
Regular price From $110.00 USD to $216.00 USDRegular priceUnit price per -
Five Star Project X™ - .999 Fine Silver Clay
Regular price From $26.15 USD to $68.00 USDRegular priceUnit price per -
Five Star Project X™ - .999 Fine Silver Syringe - 10 gram
Regular price $52.00 USDRegular priceUnit price per -
Five Star Project X™ - .999 Flex Fine Silver Clay
Regular price From $26.15 USD to $214.00 USDRegular priceUnit price per -
Five Star Project X™ .999 Water Paste - 15 grams
Regular price $76.00 USDRegular priceUnit price per -
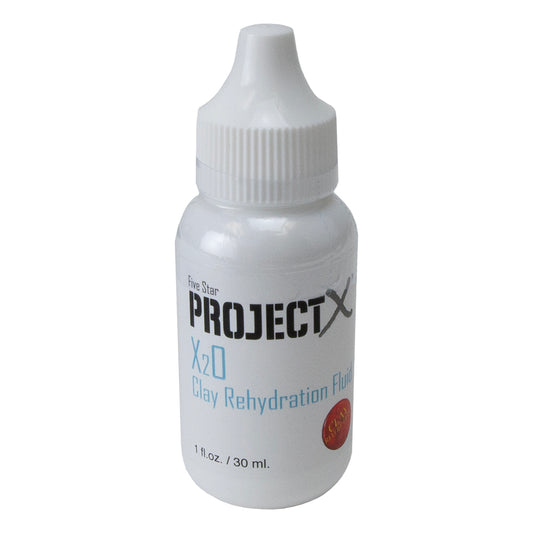
Five Star Project X™ X2O Rehydration Fluid
Regular price $8.35 USDRegular priceUnit price per -
Cool Tools Silver Clay Bundle
Regular price From $599.00 USD to $1,179.00 USDRegular priceUnit price per -
EZ925™ Sterling Silver Clay
Regular price From $99.95 USD to $289.95 USDRegular priceUnit price per -
Cool Tools Fine Silver Clay Bundle
Regular price From $299.95 USD to $590.95 USDRegular priceUnit price per -
Cool Tools Sterling Silver Clay Bundle
Regular price From $299.00 USD to $579.00 USDRegular priceUnit price per


Collection: Silver Clay
Silver Metal Clay
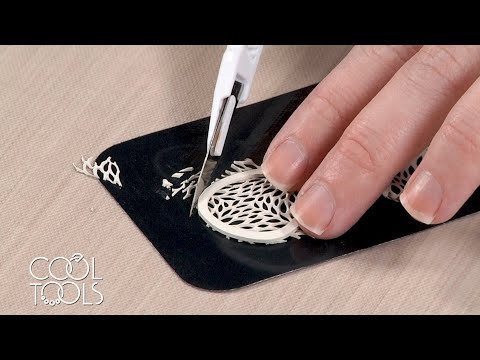
There's no need to be jeweler or metalsmith with metal working experience to make your own jewelry in silver when there is metal clay! Silver metal clay is fired with a kiln or torch and results in a solid form of silver metal. Some fine silver clays can be fired with an inexpensive torch, making silver clay very approachable for the beginner.
Precious metal silver clay comes in all forms, from .999 fine silver clay to silver alloys such as .960 and .925 Sterling. These silver alloys, along with their fine silver counterparts, offer the modern metal clay artist a large range of silver products to choose from, depending upon the needs of the artist and the jewelry created. Shop all of our silver metal clay and discover the individual properties of each clay offered, along with its uses, workability, firing options and more.

The firing schedules included in the packaging list minimum times and temperatures, not ideal times and temperatures for firing silver clay. The variety of times and temperatures for each clay type makes it possible to co-fire embedded items along with the clay, and it also allows for a variety of firing methods. What the guides don't mention is that there is a trade-off in the strength of the final product when firing at anything less than the optimum schedule (for fine silver clays) of 2 hours at 1650°F / 899°C in a digitally controlled kiln.
The Sintering Process
A common misconception about silver metal clay is that after firing it's solid metal, just like a casting, but it's not. Castings are made by pouring molten metal into a mold and allowing it to solidify. The result is a very strong, solid metal object with very little porosity (porosity is the technical term for air spaces). But fine silver clay is not at all like a casting. Fine silver clay is sintered.
Sintering is a process where tiny particles of metal are brought to a temperature just below their melting point, a point where the metal is able to bond to itself. Sintered objects are always porous because the metal particles are not like blocks that stack together nice and tidy, they are various sizes and shapes, and they don't fit together perfectly.
To visualize the structure of sintered metal, imagine a dish of lemon drops. Each candy is touching another one, but because of their shapes, they cannot make complete contact with each other, leaving open spaces between each piece. At sintering temperatures a bond is formed only where particles touch, so a fully sintered object is not completely solid even though it appears to be on the outside.
To understand how porosity impacts the strength of fine silver clay, imagine those lemon drops again. Sugar can be sintered, just like metal, so if we heated up the dish of lemon drops to a point just before the sugar melts (when the candy is sticky and tacky), the candy will bond everywhere the pieces contact. When the candies cool, the sugar recrystallizes and the candies will hold together in a mass. Because of the air spaces the mass is weak and can be broken if it's dropped, bent, or receives a blow. It's the same with fine silver clay, but on a much smaller scale.
When a sintered object breaks, the break is irregular and the inside appears to be grainy and is a lighter color than the outside. Fine silver clay objects have the same look when broken. Many mistake this typical breakage pattern for "under-fired" fine silver clay when what they are actually seeing is the telltale sign of sintered metal.
Time, Temperature & Strength
Sintering does not happen instantly, which is why it's called a process. It takes a while for the metal particles to form a strong bond. The longer fine silver clay is held at its sintering temperature, the more fully the individual particles are able to bond to each other. When fired at the lowest temperature for the shortest time, the bond that is created is not nearly as strong as when fired at the ideal temperature and time.
When to Lower the Temperature
Lower the temperature and shorten the firing time only when you have to. If you want to fire glass, heat-sensitive gemstones, or sterling silver along with fine silver clay, the temperature and time will need to be reduced for these items to survive. This is where the various firing schedules come in handy. Use the firing guides to find the clay that is compatible with the item you want to co-fire, and use the highest temperature and longest time you can within that range.
Teachers will often fire at less than ideal temperatures in a workshop or classroom situation because they have to budget their time to be sure your work gets in and out of the kiln and still leaves time to finish. When they have the luxury of time, however, they will fire at the optimum schedule. It's a good idea to re-fire at optimum anything that was hastily fired in a classroom as long as there are no heat-sensitive inclusions (glass, sterling, heat-sensitive stones).
When firing at less than the optimum schedule, be mindful of the trade-off. Avoid delicate tendrils and lacy details that are not supported. These can be easily broken during finishing, tumbling or in daily wear. Beef up ring shanks and bracelet links. Reinforce connections so you have a larger area of contact on components such as jump rings, bails, and pasted on elements. Remember that thicker pieces are less prone to breakage. Consider multiple firings if you need to include something that requires low firing, especially in the case of rings or bracelet parts.
Quick Reference Minimum vs Optimum Firing Schedules
| Minimum Temperature/Time |
Optimum Temperature/Time |
|
| Art Clay Silver |
1200°F / 30 min | 1650°F / 2 hours |
| Art Clay Silver 950 |
No minimum |
2 stage firing |
| EZ960 Sterling Silver |
1650°F / 4 hours |
1675°F / 2 - 4 hours |
| FS999 Fine Silver | 1600°F / 3 hours | 1650°F / 2 hours |
| Phoenix Fine Silver |
1200°F / 30 min | 1650°F/ 2 hours |
| Metal Magic Fine Silver |
1470°F / 30 min | 1600°F / 2 hours |
| Metal Magic 960 Sterling |
1600°F / 30 minutes | 1600°F / 2 hours |
| Project X Fine Silver | 1350°F / 2 hours | 1650°F / 2 hours |
| Project X 925 Sterling |
No minimum |
2 stage firing |
| Project X 960 Sterling | 1600°F / 1 hour | 1600°F / 2 hours |
Max Firing Temperature
The melting point of fine silver is 1763°F / 961°C. You may find slightly conflicting numbers, but the fact is, at this temperature, give or take a degree, fine silver will be a molten blob. Obviously, in order to transform our carefully crafted treasures into silver works of art, we need to avoid anything close to 1763°F / 961°C or our hard work will be just a forlorn memory.
At 1110°F / 599°C fine silver becomes "open" to fusing, but is cool enough to maintain its form. Up to 1650°F / 599 fine silver will fuse and still hold it's form, so this is why the range of temperatures for sintering all forms of silver metal clay is between 1110°F / 599 and 1650°F / 599.
Digitally controlled kilns will sometimes creep up above their target temperature and a rise of a few degrees above or below your target temperature is nothing to worry about. Kilns usually go just a little over their target temperature, but will fall more than that. If your kiln overshoots your target temperature by more than 20 degrees, check the thermocouple to be sure it's functioning properly because temperatures just a few degrees above this will show the early stages of melting and will be detrimental to your fine silver clay objects.
Max Firing Time
Each fine silver clay formula has a minimum firing time and temperature, but what's the maximum? We know the maximum temperature for all forms and types of silver metal clay is 1650°F / 599°C, but what's the maximum time? Technically, there is no maximum firing time. As long as you do not exceed 1650°F / 599°C, a piece could be fired for the next year and it wouldn't hurt it. For fine silver clays, longer firing times are called a "soak," and normally are fired for 3 or 4 hours at the target temperature. An artist may opt for a "soak" if they want to ensure complete sintering, or, if they intend on bending the piece post firing.
Support
Remember that fine silver clay is just below its melting point when it's sintering. At sintering temperatures, fine silver clay is vulnerable to the forces of gravity because the binder has long since burned off and the particles are all by themselves with no support. Gravity will push against a fine silver clay structure as it's firing and slump it if it can. Don't take it personally, it's just what gravity does. The trick is to outsmart gravity and give your pieces support while they fire so they can't slump or deform. Flat pieces are the easiest to fire because where is the metal going to go, right? Gravity will work in your favor, but sometimes you'll find that a piece that was fired flat ends up slightly lumpy and not flat after firing. This can result from "surface drag", embedded stones, glass or other items fired in place.
Surface Drag
Surface drag is what happens when the fine silver clay begins to shrink, but is hampered by the surface it's sitting on. Sprinkle a little alumina hydrate on the firing surface to avoid drag.
Puckering
When a stone or some other object is co-fired with fine silver clay, you've got a little problem. The embedded object is not going to shrink, but the fine silver clay shrinks from all directions (length, width, thickness), pulling itself toward the center. If a small stone is embedded (3mm or less), it's not that noticeable. But larger stones will show strain around objects, depending on the size and how they were embedded. The clay will often begin to move upward as if trying to eject the embedded object, and leave what could be called a "blow hole" strain.
The solution to puckering is very simple; give a little bit of room around an embedded item to account for the shrinkage. Obviously, the larger the stone, the more space that is needed to account for the shrinkage. For high shrinkage clays (clays that shrink more than 20%), your opening needs to be around 20-25% larger than your stone. For all other forms of silver metal clay, the opening should be 5-8% larger. The idea is to give enough room for the clay to shrink just to the item embedded, but enough that it locks in place. It's also a good idea to make an azure behind the stone so it isn't ejected from its setting as it shrinks. Azure means "light". You'll see azures in fine jewelry. Diamonds are almost always set with azures...little openings behind the stone that let the light reflect through it.
For wet setting, first make a hole about half the diameter of the stone size you are setting. Then press the stone into the hole.
For dry setting, mark the center with a small ball stylus or needle tool while it's wet, then use that mark as a drill guide and use a twist drill to drill the azure. Then use a stone setting bur to drill the seat for your stone. Your stone setting bur should be slightly larger than the stone you are setting. For small stones from 2mm to 3mm, use a matching sized bur and set the stone down to it's table. For larger stones, use one size larger than your stone and cut the seats so the stones sit enough below the girdle that the clay can get a grip on it when it shrinks. You'll need an eye that's been calibrated through experience to know exactly how deep to set a stone, but while you are learning, go slow and keep testing.
Flattening
If a piece that was supposed to be flat is not flat after firing, you can often reshape the item. You'll need a bench block and a mallet. Place the item on a bench block (a hardened metal surface) and use a rawhide mallet to tap the high spots flat. A rawhide mallet will not distort the surface of your fine silver clay if you use light blows. Your goal is to flatten the form, not distort the metal. Avoid hammering directly on large stones. 4mm and smaller stones can usually sustain gentle blows as long as the culet (the pointy back end of the stone) is not hitting against the bench block as you tap.

Dimensional Objects
Anything that is domed, hollow, rounded, or has pieces that are hanging out in space, needs support during firing. A firing dish filled with finely crushed vermiculite or alumina hydrate can be used to nestle pieces for support during firing. Vermiculite is a mineral used industrially as insulation, packing material, and even as a hydroponic growing medium, among many other uses. Vermiculite is completely safe to handle. Alumina hydrate is a powdered ceramic material used in refractory products and glazes. Alumina hydrate has a very nice texture and provides superior support. Be careful when working with alumina hydrate that you do not kick up dust. Alumina hydrate is an irritant to the lungs.
Another good support is fiber blanket. You can use tufts of the fiber blanket like cotton and make custom supports for cantilevered items or pieces that need some support during firing, but do not lend themselves to being buried in vermiculite. Fiber blankets are made of spun ceramic fibers and the airborne fibers should be avoided as they can irritate your lungs if inhaled.
Look at your piece and decide the best way to fire it to avoid flat spots, deformation, etc. A ring should be fired on a ring pellet or its side to avoid a flat spot if the design allows for it. Round objects need to be placed on a fiber blanket or nestled into a dish of crushed vermiculite or alumina hydrate. Place dimensional objects so that gravity will work for you rather than against you. Domes should be placed face down during firing. Lentils can be placed sideways. Be careful when "nestling" the unfired pieces into vermiculite to avoid scratching or denting the soft clay surface.
You may be advised to use a terra cotta plant bottom as a firing dish. I don't recommend this because terra cotta is a bisque fired clay that will always crack in the kiln, usually the first time you use it. Use a high-temperature ceramic dish to fire fine or sterling silver clays. You'll have something that will last for years rather than constantly throwing out terra cotta bottoms and cleaning out your kiln.
Re-Firing
Anything made of fine silver can go into the kiln more than once. Let's say I want to make a ring with a natural peridot gemstone fired in place. The maximum safe time and temperature for most peridot is 1470°F / 799°C for 30 minutes. I could fire the entire ring at that schedule, but then my ring shank would not be very strong. Rings take more abuse than any other piece of jewelry, so, if possible, fire the ring shank at the ideal and then re-fire with the heat sensitive stone. In this way you can get the best of both worlds.
Keep in mind that you don't have to fire fine silver clay just once...fire as many times as you need to accommodate low-fire inclusions, to add on to previously fired pieces, to make repairs, or to add findings. Re-firing does not hurt fine silver.
If the piece you wish to re-fire was supported in a firing dish with vermiculite, alumina hydrate or on a fiber blanket, you'll have to support it all over again when re-firing. The same gravitational stresses will be placed on the piece when it reaches the near-melting temperatures for re-firing.
Adding Unfired Fine Silver Clay to Fired Fine Silver Clay
To successfully add new clay to pre-fired fine silver clay, the new clay needs to get a grip on the old in some way. If you know you will add to a piece as you are making it, you can prepare the area in advance to get the strongest connection. Score grooves or lines in the wet clay or scratch into the dried clay where you know you'll add on. Once the main piece has been fired, the grooves will give the new clay a hand-hold and make the connection much more reliable after firing. Firing at optimum (2 hours/1650°F / 899°C) will achieve the strongest bond.
Adding Ring Tops and Stacking Components
Where you want to stack a component for a ring top, score the area to be added to when the clay is wet or after its dry. Then you can fire that portion of the project. After firing, added clay can be pressed into the grooves where it can get a hold on the existing metal, making for a more secure connection of the new piece.
Pieces that have been burnished and finished will have a smooth, hardened surface which makes it more difficult to get a good bond. A finished piece may also have a patina. A patina is an oxidized surface that will interfere with bonding, so it must be cleaned off before adding to it. To clean and prepare the surface, the piece can be pickled or re-fired. Pickle in Silver Prep and then rinse well, or fire at 1400°F / 760°C for 20 minutes. Rough up the area to be bonded to. Drill holes, file grooves, or use a separating disc or diamond cut-off wheel to score up the area to be bonded before adding fresh clay. The idea is to give the new clay something to hold on to.
Components can be pasted on with slip, syringe or lump clay directly to the freshly fired surface. Allow additions to dry completely and then fire at the highest temperature and longest time you can for the items you are adding. Art Clay Oil Paste makes a very strong bond for connecting 2 previously fired pieces, adding silver components to fired pieces, and for making repairs. Lavender oil can be added to PMC paste to make an oil paste (add 15 drops of pure lavender oil to a container of PMC3 paste to make your own oil paste, stir it in and let it sit overnight to assure complete absorption before using). You can use Art Clay Oil Paste with PMC plus or PMC3 as well as all Art Clay products.
Repairing Broken Areas
Most pieces that fail break because they were not fired at optimum and/or the piece was too thin or delicate for the application. Often times the repair that is needed is a butt joint. A butt joint is where 2 pieces butt up together, head to head, but don't overlap. This is usually a very small area of contact that can be easily re-broken if the rest of the piece is too weak to support the structure. Repaired joints are not as strong as a virgin piece of fine silver clay, so you may want to add additional thickness to the piece as well as repairing the joint.
Consider the durability of the design compared to how it's used. If your piece is a ring, maybe it's just too thin to survive the trials and tribulations of a ring. You may be better off making a new shank out of fresh fine silver clay and adding the broken pieces of your original ring to the design and create something new and really cool. This is one of the ways you'll learn what's possible and not possible with this medium.
Where you do want to make a repair, it's best to use oil paste for the strongest bond, and if you can, add clay to the area to support it. If a bail breaks off, adding a tab of clay to the back to bridge the broken pieces is better than trying to make a bond with just a little paste added to the break.
Co-Firing Natural and Man-Made Gemstones
Our gemstone firing guide, Gemstones in Metal Clay, lists safe times and temperatures for many gemstones, both man-made and natural, that can be successfully fired in place. Our guide lists the highest safe temperature and time for each gemstone and teaches you how to determine which stones will be safe in the kiln.
To avoid burning your stone, do not exceed the safe firing time or temperature. If a stone is listed as safe to 1470 °F / 799°C for 30 minutes, lowering that temperature does not mean you can extend the time. If you do, the result may be a burnt stone.
Luckily for us, most nano gems and cubic zirconia stones can be fired at the ideal schedule with no change in color. There are some colors that are very heat sensitive and have special firing schedules. Tanzanite CZ's are very heat sensitive and are probably best to set after firing, but can be fired in place at very low temperatures. Bright green CZ's such as emerald or tsavorite and nacarat (black) are all heat sensitive and must be fired with care. Bright orange stones are quite hardy, but can darken if fired at too high a temperature. All of these details can be found in our firing guide, Gemstones in Metal Clay.
Never quench pieces with embedded stones of any kind.
Burnt Stones
Have you ever pulled a piece from the kiln to find what was once a beautiful, brilliant gemstone has turned green or muddy brown? What happened is very simple...the temperature and/or time were too long for the stone and it burned. It might look awful now, but there is a way to save it.
Stones go through a series of colors as they burn. Peridot, for instance, when overheated or kept too long at it's safe temperature will turn a slight brownish green, then an olive green color and eventually a reddish color. To salvage a piece with a burned stone, just re-fire it at 1650°F / 899°C for 1 or 2 hours to get a gorgeous deep cognac red color. It may not be the color you were after, but it beats scrapping the whole project.
To avoid burning gemstones, be sure and download our free guide, Gemstones in Metal Clay. This helpful guide gives firing times and temperatures for any gemstone you can imagine. Some stones are safe, and others are not to be attempted, but this guide will sort out for you what works from what doesn't in the kiln. To make your life easier, we also print the safe firing temperature on each package of gems we sell.
Co-Firing Glass
Whether you want to fuse your own glass cabs or co-fire pre-made glass, co-firing in fine silver clay is very easy.
There are many types of glass, and each brand and type has a different COE (coefficient of expansion), which is the rate at which it expands and contracts as it's heated and cooled. The most common glass used for fused cabs has a COE of 90. We'll focus on firing with this type of glass, but realize that just about any glass can be successfully fired in fine silver clay.
Co-firing glass and fine silver clay presents a few technical issues that you should know about. Glass will stick to an untreated ceramic kiln shelf, so you'll need to prepare your shelf with kiln wash, or protect it with ceramic fiber paper. The ceramic fiber paper is easier to use, but should be pre-fired to burn out the binders before use. Fire to 1400 °F / 760°C before use. (You don't need to hold the temperature, just heat to 1400°F / 760°C and turn the kiln off). Handle with care after firing as the paper will be fragile.
We've actually fired directly on unprotected hard fiber kiln shelves up to 1300 °F / 704°C and had no problems sticking. At 1500°F / 815°C, a few pieces stuck in a few spots, so higher temperature really should have paper on the shelves.
Another issue with glass and fine silver clay is fuming. As fine silver clay fires, silver fumes can build up in the kiln and cause a smokey-metallic discoloration called fuming. This is simple to avoid by venting the kiln. When you co-fire glass and silver, remove the ceramic plug from the top of your kiln, or use the vent prop on the kiln lid to allow the silver fumes to escape as you fire. Fumed glass is lovely when you expect it, but it can be very disappointing when you wanted rich, vibrant colors.
Something else to consider is that glass must be annealed after heating. Annealing is a slow cooling process that allows the glass to return to room temperature without cracking. Heating creates stresses in the glass that must be relieved as it cools, and this process is called annealing. If glass is not properly annealed, it will crack or shatter. If a piece is improperly annealed (cooled too quickly), it might break today or several weeks from now.
One other important detail to remember is that you'll need to be sure your glass piece is squeaky clean before firing. Every speck of fine silver clay dust left on the glass with fuse to the surface when it's fired. If you don't want silver polka-dots on your glass, be sure to clean the surface with alcohol before firing. Use cotton swabs rolled into little pointed daubers and clean up any silver bits from the surface and especially at the edge where the fine silver clay and glass meet.
Don't use water on your swab to pick up the silver dust. Water will soften the clay and create a muddy mess.
Creating a Setting
Glass cabochons (cabs for short) are everywhere these days, and luckily they are very easy to fire in place. Most of the glass cabs available are COE 90 and are quite easy to fire in place. Whatever your design, you'll need to make sure the glass is trapped in place so it cannot fall out of it's setting after firing. Most people make a "seat" for the stone by placing it on the wet clay and tracing around it with a needle tool, then removing the excess clay below the cab and setting the cab in the resulting hole. When you cut out around the cab, hold the needle tool straight up and down so you have a little extra space around it to account for shrinkage of the clay. By giving a little extra space, you'll relieve the stress that can break the glass or tear the fine silver clay as it shrinks.
Depending on the size of the cab and the thickness of the clay, this may be all you need. However, if your cab is large, or to add visual interest, you might want to add a rope of clay or syringe around the stone to form a "bezel" or set the stone in a bezel made from bezel wire or fine silver clay.
Most COE 90 glass is fused at temperatures around 1480°F / 804°C to 1550°F / 843° C. At this temperature range, the glass is molten and will slump, rounding the edges. To preserve the shape of your cabochon, you'll need to stay below the fusing temperature.
COE90 Firing Chart
| Technique | Schedule | When To Use |
| Tack Fuse | 1200°F to 1350°F soak for 30 minutes |
To co-fire in fine silver clay with no change to glass To fuse glass together without changing the shape |
| Full Fuse | 1400°F to 1500°F soak for 30 minutes |
To fuse glass and fine silver clay together To fully fuse glass and round the edges |
| Fire Polish | 1100 °F to 1200°F soak for 5 minutes |
To make cut or ground glass edges shiny, without changing shape |
| Crack Repair | 1400°F to 1500°F soak for 30 minutes |
To repair a cracked piece of glass |
| Bubble Repair | 1200°F to 1250°F soak for 30 minutes |
To squeeze out bubbles from glass |
Annealing Glass
Annealing is a critical step. Don't confuse glass annealing with metal annealing...they are 2 different processes to achieve 2 different outcomes. Glass annealing, as fancy as it sounds, is simply a controlled cooling. Glass expands as it is heated and contracts as it cools. If glass is cooled too quickly, it will thermally shock and crack. The way you will anneal depends on the temperature you have fired at.
Crash Cool Annealing
If you have brought your glass to the melting point (full fuse temperature), you'll need to crash cool the kiln. Crash cooling brings the interior temperature down quickly so the glass stops moving.
To crash cool, simply open the kiln door about 2 inches and watch as the temperature falls. When it reaches 1100 °F / 599°C, close the door. The temperature will now begin to creep back up. When the temperature stops rising, open the door again and allow the temperature to fall to 1100°F / 599°C. Repeat this until the kiln stays right about 1100°F / 599°C. Then do not open the door again until the temperature is below 200°F / 93°C.
No-Peak Annealing
If you have fired to 1400°F / 760°C or less, just leave the kiln undisturbed (that means don't open the door!) until the interior temperature is below 200°F / 93°C. That's your entire annealing process. It couldn't be easier.
Co-Firing Dichroic Glass
Most dichroic glass cabochons are made by fusing layers of glass at around 1500°F / 815°C. To maintain the shape of the cabochon, fire at a temperature below 1450°F / 788°C. If you fire at 1470°F (a typical temperature used), the glass will fuse with the fine silver clay and slump somewhat. The longer it is fired, the more it will tend to slump. If you want the glass to remain unchanged, fire at a temperature well below the softening point so the glass remains solid. A good choice is 1300°F.
If your glass develops a crack, re-fire it at 1450°F / 788°C for 30 minutes to allow the glass to fuse. Then anneal.
Co-Firing Lamp-worked Glass
There are some very talented people making wonderful lamp worked glass jewels. These glass pieces can be fired in place with fine silver clay. It's best to keep the temperature low since lamp workers often use a COE 33 glass.
Co-Firing Beach Glass
Some beach glass can be safely co-fired with fine silver clay. Beach glass is usually a soda-lime composition with a fairly low melting point. If it's fired at too high a temperature, this type of glass can slump and lose its lovely frosted surface. To assure the glass remains unchanged, fire at a temperature well below the softening point so the glass remains solid. A typically safe temperature is 1250°F / 677°C for 30 minutes.Another issue with beach glass is the color. Since you probably don't now exactly what the glass is, there's no telling what might happen to the color in the kiln. You''ll have to test fire a sample alone in the kiln to find out how hardy the color is. Place a sample of your glass on a kiln shelf lined with kiln shelf paper (thin fire paper) and fire at 1250°F / 677°C for 30 minutes, then anneal to see what happens to the color.
Repairing Cracked Glass
If you know what kind of glass you have, you can easily repair a cracked glass stone in your kiln. To repair a crack, you just need to re-fuse the glass. See the glass firing chart above and use the full fuse temperature.
Co-Firing Fine Silver Findings
Fine silver wire, bezel wire, bezel cups, findings, or anything made of purely of fine silver can be co-fired with fine silver clay without any change in firing time or temperature. Anything that is made of fine silver can be fired at 1650 °F / 899°C for 2 hours. Remember, fine silver clay is made of fine silver, so anything that applies to fine silver clay also applies to fine silver findings, wire, etc.
Co-Firing Sterling Silver
Sterling silver findings can be co-fired with fine silver clay. Sterling silver will need to be properly prepared to fire in place, and care must be taken in the firing. Do not fire sterling silver findings over 1200 °F / 649°C and do not fire for more than 30 minutes. Sterling silver becomes brittle at temperatures higher than 1250°F / 677°C and longer than 30 minutes.
Depletion gild sterling silver before firing in place. Depletion gilding will bring up a skin of fine silver on the surface of the metal by oxidizing and then dissolving the copper near the surface. To depletion gild, first heat the sterling silver with a torch or in a kiln until it turns a dark charcoal gray. Then soak in Silver Prep to dissolve the oxidized copper from the surface (the surface will appear white). Repeat this process until you cannot darken the surface of the metal with the heat source. For small items such as wires, findings, and stone settings, 2 rounds is usually enough. For larger pieces, 3 or 4 rounds may be required.Rinse the pickled item and embed or paste on the sterling component. When the added fine silver clay is completely dry, fire at no more than 1200 °F /649°C for 30 minutes.
Co-Firing Porcelain
Porcelain is a high-fire ceramic and can handle temperatures in excess of 1650 °F / 899°C. Co-fire porcelain at optimum temperatures. Do not quench porcelain.
Co-Firing Bisque Ware
Bisque ware is a low-fire ceramic and can handle temperature in excess of 1650 °F / 899°C. Co-fire bisque at optimum temperatures. Do not quench bisque ware.
Burning Out Organics
Natural organics are sticks, twigs, leaves, pods, seeds...and anything else that was created by nature...not man. For the most part, these items burn away completely in the kiln. Some items are dense and take a while to burn up. For these types of organics, such as twigs and cork clay, it's smart to fire to 800° F / 427°C and hold for 30 minutes before progressing to your ultimate firing temperature. Dwelling at the lower temperature gives the organic material time to combust and burn completely before the fine silver clay begins to sinter. Sometimes organic items can burn hot and slow. Slowing down the firing schedule gives dense organics a chance to burn away without endangering the fine silver clay object.
Some objects, such as shells, are calcium based and do not burn out. Paper clay is made, in part, with volcanic ash and does not burn out completely. For solid, closed objects this would not be a problem, but for items that are open, a cork clay may be preferable.