Shop Products
-
Newest Products
-
Best Sellers
-
Cool Tools Brand Products
-
Aureus™ Bright Bronze Clay
-
Clay Hydrator
-
ClayMate
-
Clay Rolling Frames
-
Clay Rollers
-
Clay Tack
-
CoolSlip
-
Cyprus™ Copper Clay
-
Dry Release
-
Drying Forms
-
EZ925™ Sterling Silver Clay
-
EZ960® Sterling Silver Clay
-
Finishing Touches Molds
-
Flexi-Carve
-
FS999™ Fine Silver Clay
-
Jewel Stamps
-
Mega Mold
-
Metal Clay
-
No-Flake Firing Foil
-
Painting Powder for Silver & Enamel
-
Patina Gel
-
Phoenix Torch Fireable Clay™
-
Quality Stamps for Wet Clay
-
Ready Molds
-
Rejuvenate
-
Ring Sizers
-
Setting Molds
-
Silicone Ring Mandrels
-
Silver Prep
-
Slik
-
Stone Setting Punches
-
Templates
-
Textures
-
Ultra Clay Pick
-
Tuff Cards
-
Work Surfaces
-
-
Metal Clay
-
Polymer Clay
-
Kits & Bundles
-
Tools & Equipment
-
Accessories
-
Adhesives
-
Brushes
-
Cool Tools Brand Products
-
Drills & Burs
-
Hammers
-
Filing & Sanding
-
Magnifying & Optical
-
Measuring & Testing
-
Metal Clay Tools
-
Metal & Bench Working Tools
-
Metal Stamping
-
Polymer Clay Equipment
-
Pliers, Cutters & Saws
-
Polishing & Burnishing
-
Safety
-
Silhouette Portrait® & Curio™
-
The Small Pottery Wheel
-
Soldering
-
Stone Setting
-
Tweezers & Holding
-
Shop by Brand
-
-
Kilns & Firing
-
Enameling
-
Metals
-
Powder Coating
-
Gemstones
-
Chain & Wire
-
Findings
-
Finishes & Embellishments
-
Accent Gold & Accent Silver
-
Cernit® Varnish
-
Concrete & Pigments
-
Drawing
-
Enamel Markers
-
Faux Bone™
-
Fine Silver & Gold Painting Powder
-
Foil Sheet & Gold Plating
-
Gelli Arts®
-
Gilders Paste
-
Green Stuff World Dipping Inks
-
Lacquers & Polishes
-
Lumiere Lusters
-
Metal Etching
-
Mod Podge®
-
Mica Powder
-
Patina
-
Pebeo Porcelaine Paints
-
Perfect Pearls™
-
Pigment Powder
-
Powder Coatings
-
Rub 'n Buff
-
Shiva® Paintstiks
-
Silk Screens
-
Slide Transfers
-
Sprinkles & Flakes
-
Tim Holtz
-
Vintaj®
-
-
Resin
-
Templates & Stencils
-
Textures
-
Pam East Products
-
CRAFTCAST Kits
-
Clearance
-
Gift Cards


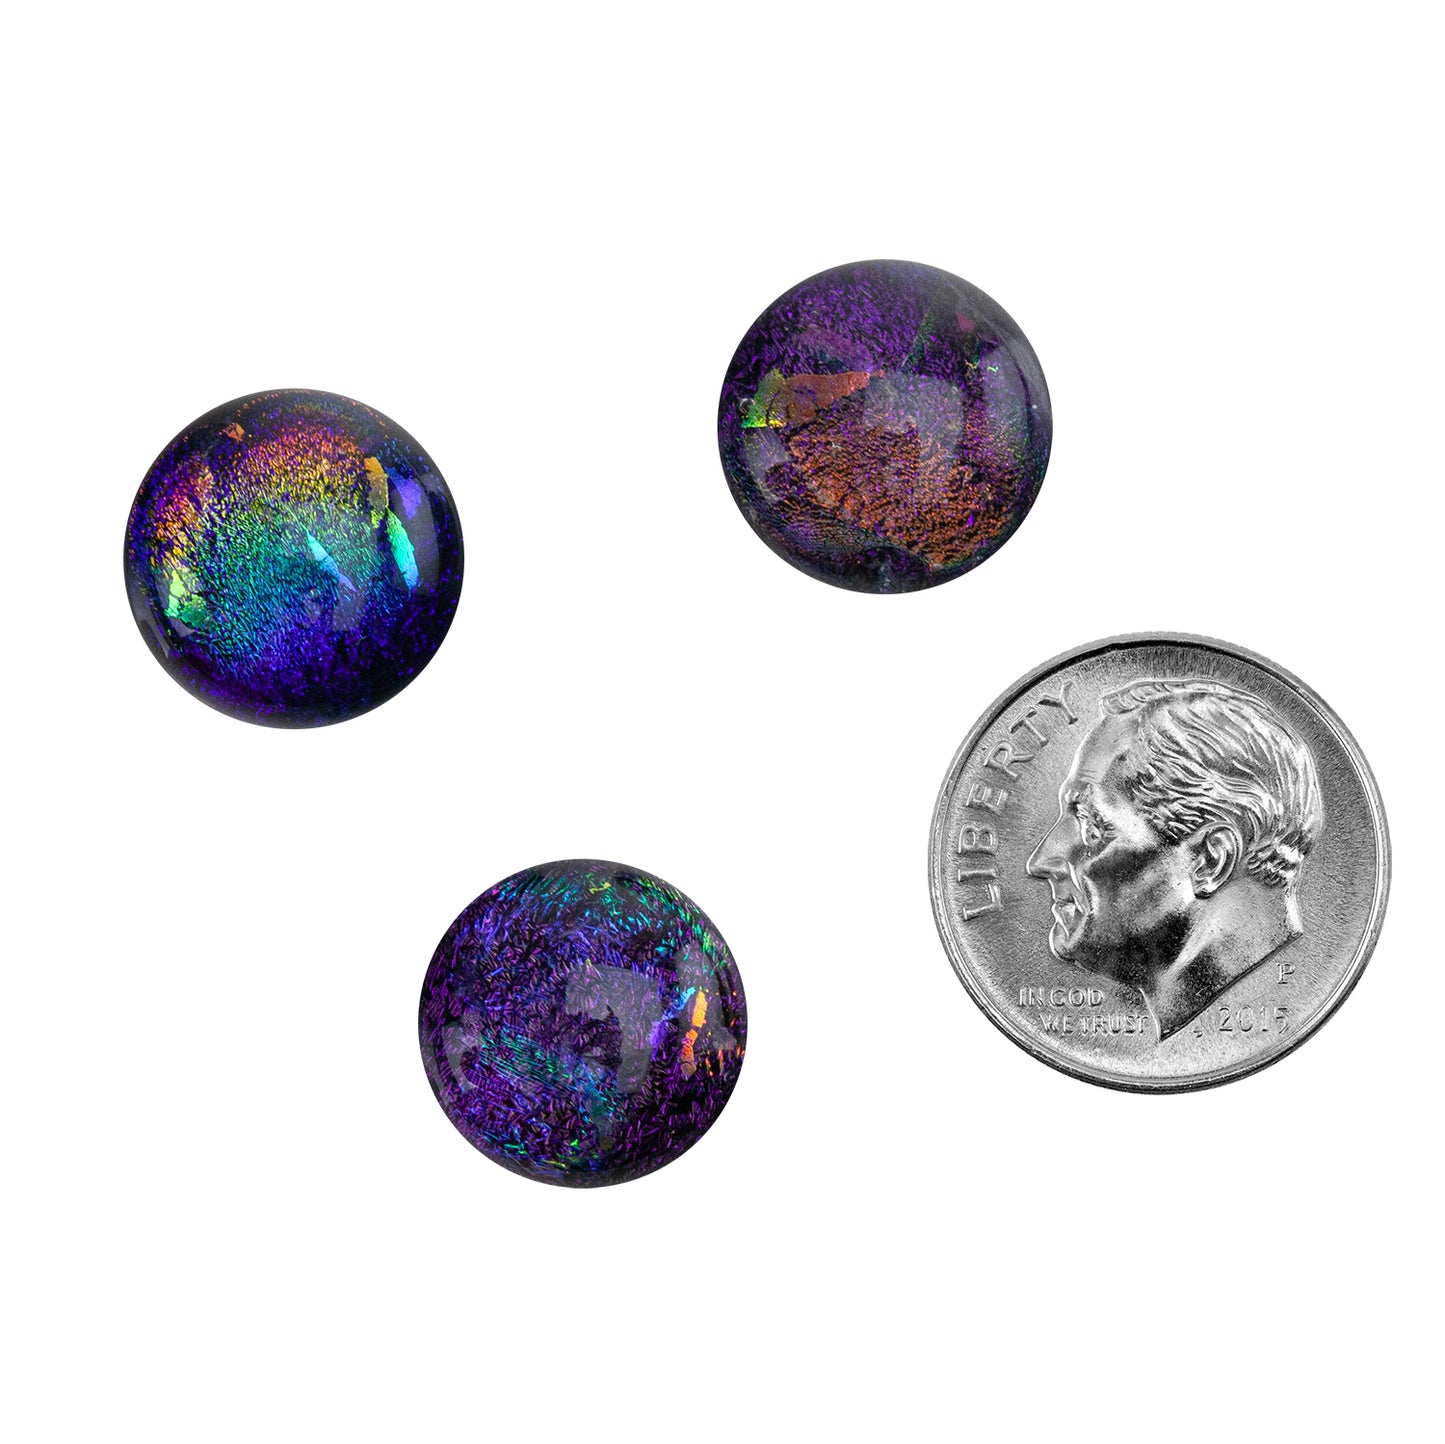
Dichroic Cabochons - Purple Medium - 12mm to 16mm Pkg/3
Dichroic Cabochons - Purple Medium - 12mm to 16mm Pkg/3
SKU:DIC-119
Choose a Size
Made in USA
Couldn't load pickup availability
Dichroic Cabochons
You'll receive a range of sizes, shapes and combinations of colors from our stock of vibrant dichroic glass. Made in the USA.
Our dichroic glass cabs are made from COE 90 glass and are quite easy to fire in place.
How to Create a Setting
You’ll need to first make a “seat” for the glass. Whatever your design, you’ll need to make sure the glass is trapped in place so it cannot fall out of its setting after firing. During firing, the clay will shrink around the gem and trap it in place. One way to do this is to place the glass on the wet clay and trace around it with a needle tool, then remove the excess clay below the cab and set the cab in the resulting hole. When you cut out around the cab, hold the needle tool straight up and down so you have a little extra space around it to account for shrinkage of the clay. By giving a little extra space, you’ll relieve the stress that can break the glass or tear the metal clay as it shrinks.
Depending on the size of the cab and the thickness of the clay, this may be all you need. However, if the cab is large, or to add visual interest, you could add a rope of clay or syringe around the stone to form a “bezel” or set the stone in a bezel made from bezel wire or metal clay.
How to Fire Glass in Place
Dichroic cabochons can be fired directly in place with low fire silver clay. Fire silver clay on either an untreated hard ceramic shelf or a ceramic fiber shelf. Sit each item with glass on a piece of ceramic fiber paper cut to size. If you want your glass cab to remain completely unchanged while it is fired, meaning it does not melt at all and does not change shape, fire your piece at 1300°F for 30 minutes and then anneal using the no-peek method.
If you want the glass to fuse to the metal clay, fire at 1450°F for 30 minutes, then crash cool and anneal using the crash-cool method.
How to Anneal Glass
Annealing is a critical step. Don’t confuse glass annealing with metal annealing…they are 2 different processes to achieve 2 different outcomes. Glass annealing, as fancy as it sounds, is simply a controlled cooling. Glass expands as it is heated and contracts as it cools. If glass is cooled too quickly, it will thermally shock and crack. The way you will anneal depends on the temperature you have fired at.
Crash-Cool Annealing
If you have brought your glass to the melting point (full fuse temperature, 1450°F or higher), you’ll need to crash cool the kiln. Crash cooling brings the interior temperature down quickly so the glass stops moving.
To crash cool, simply open the kiln door about 2 inches and watch as the temperature falls. When it reaches 1100°F, close the door. The temperature will now begin to creep back up. When the temperature stops rising, open the door again and allow the temperature to fall to 1100°F. Repeat this until the kiln stays right about 1100°F. Do not open the door again until the temperature is below 200°F.
No-Peek Annealing
If you have fired to 1400°F or less, just leave the kiln undisturbed until the interior temperature is below 200°F. That’s your entire annealing process. It couldn’t be easier!
Kiln Shelves and Kiln Wash
Kiln shelves sometimes need a special treatment depending on what is being fired. Glass, glazes and enamel contacting an untreated kiln shelf will fuse to the surface and ruin the shelf. Ceramic shelves are expensive, so care should be taken to protect them. A mixture of kaolin and alumina hydrate (called kiln wash) is applied to a hard ceramic kiln shelves and baked on to create a durable, non-stick glass fusing surface. Kiln wash is only used on hard ceramic shelves, not ceramic fiber shelves, and should be reserved for glass fusing, glazing or enameling use. Metal clay does not need a kiln-washed surface. Bullseye ThinFire Kiln Shelf Paper is also a great choice for protecting your kiln shelf.
Share